Saturday, January 30, 2010

Improving my Photos. Wanna Know How?

Like most people on Etsy, I take my own photos. After asking for critiques, I was told that my photos needed some work.

They appeared dark and a bit blurry. Plus, I had noticed that the color looked a little off. So, I began learning about photography techniques and tools. By no means am I a professional photographer or an expert. However, I have picked up a few tips on photographing small objects like jewelry. I thought I might share a couple of them with you.

As far as cameras go, mine is by no means a top of the line. I am currently using a 4 mega-pixels camera that I bought over 3 years ago. I have no image stabilization, or face recognition with my camera. However, one thing I did insist on when I bought my camera was the ability to upgrade via lenses. So, I ended up buying what is referred to as a "High End Consumer" camera. This is a high-end point-and-shoot camera that has some features like a DSLR (Digital Single Lens Reflex Camera). It also has an adapter to add lenses to the camera. I cannot, however, remove or replace the main lens.

Since I insisted on the ability to upgrade lenses, I figure I should try to use that feature. So I ended up buying a macro lens. This lens magnifies your image by acting like a pair of glasses. It literally goes on top of my current lens. While it is a great tool, it does have some limitations. Once of which is that an adapter must be used which decreases the amount of available light picked up by the camera creating darker photos.

A great way to create better lighting is to use a light box or light tent. Etsy has a DIY listed on the Storque Blog, however I have found a better tutorial for an at home light box. Digital Photography School.com has a great tutorial for a light box. This is similar in style to the table-top studio light box I am currently using.


You need a light box that has a translucent top for my next couple of tips.

To reduce shadows, try lighting the box from the top. However do not have the light pointed straight down. A better solution is to use two lights from the top. Have the light on the right pointed down towards the left wall, and the light on the left pointed down at the right wall. You want the diagonal light paths to cross above you item in the light box. See the photo below for a picture of what I am talking about.

Even using a great light box and great lights (my light box come with professional lights, but I did switch the bulbs to true color bulbs), I have not had the amount of light I felt I needed.

A few weeks ago I found my answer. I was reading the January 2010 edition of The Crafts Repot, when I spotted an article by Steve Meltzer. The article titled “Getting Close: Photographing the World of Small Crafts”, looked at lenses and lighting when dealing with Macro photography. Steve mentioned creating a “post office box” studio. The light box was not what caught my interest, so much, as what he used to line the light box.

Aluminum Foil!

It was a eureka moment. I went and immediately lined the sides of my light box with foil. The results were amazing! The foil bounces the light back and increases the light in the box. My camera now had more light to draw on when photographing my work.

Here are the before and after.


Such a small investment yielded great results.


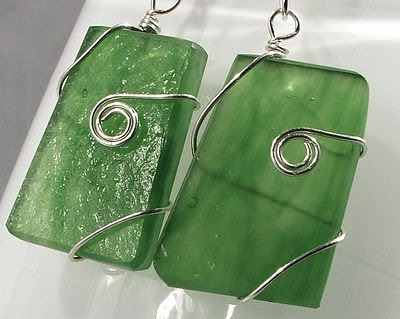
Want to purchase the items seen in today's blog? You can find them here, along with other great jewelry that I have made.

Wednesday, January 20, 2010

Wednesday Previews!

Being a full time working mother, I don’t get much time to create jewelry. So I have been finding creative ways to make and photograph my jewelry. I attempted to get some photos of three new pieces last night, unfortunately my batteries ran low before I could get a lot of good shots. So I decided to let you guys in on a preview of upcoming listings (once I get the shots I want.) Be warned though these are not my best photography. :)

Rainbow Obsidian Cabochon Necklace

This is a piece of Rainbow Obsidian that I cut a couple of months ago. I finally got around to wrapping it. The obsidian is wrapped in half round sterling silver and suspended on an 18 inch snake chain. Although you cannot see it well in these photos, there is a bulls-eye rainbow in the center of this cabochon. I hope to get some great photos that show off the bulls-eye before I list this beauty on Etsy.
Golden Rutilated Quartz Necklace

This is another cabochon that I have cut. Although this necklace does have a glaring impurity near the center, it still is a beauty. (What can I say, I believe imperfections give character!) This crystal quartz contains needles of gold rutile throughout the stone. Set in 14 kt gold fill wire and suspended on an 18 inch, triple rope, 14kt gold fill chain, I hope to have this necklace listed soon!


Sterling Silver Heart Necklace

My sterling silver heart earrings have been so popular, that I decided to create a necklace that complimented them. The result is this beautiful sterling silver heart necklace. The pendant is created from 16 gauge sterling silver wire, and has been hammered to create this wonderful texture. Truly a Valentine in the making, the heart is suspended on an 18 inch sterling silver snake chain. This one I should have listed in a few days!


I hope you have enjoyed your sneak peak of my upcoming listings! Have a great day.

Friday, January 15, 2010

New Earring Cards

I don't know about you, but I have found the more I get into my jewelry, the less time I find to do other things. Especially right before a show. So I am currently work on (among other things) trying to find more time effective ways of showing off my work.
Last year I displayed my earrings on handmade tent cards. They are alot of work. First I have to create new designs for each design I have. Then I have to print each tent card, and cut them out, making sure the lines are straight. After that I have to add holes for the earrings (2 sets for hoops). Then finally I add the earrings to the card.

So this year I have decided to go back to a flat card, instead of a tent card. And I am planning on adding sticky backed earring card adapters to them like these (earring card adapters.)

Here are the three designs I have chosen for my earring designs. There is a card for each of the major designs I have.
Sterling Silver (This includes Morning Dew Earrings)
I left room on the cards to price each piece.
I figure that these new designs will not only look nice, but will also save me time since I plan on have them professionally printed.
So let me know, what do you think of these new cards?

Thursday, January 14, 2010

Pity Party Epiphany

So one of my goals last year for my business was to get my work into a couple of stores. I would love to have a few consignments or wholesale deals.

We all would love to see our work being sold for us. In other peoples stores, getting our names out there, being recognized, and of course the extra finances that would bring. As last year came and went I found myself a bit disappointed that I had not reached that goal.

I was in the middle of a pity party over this the other day, when I remembered a quote for the old TV show Charmed (I watched a lot of this when I was at home on maternity leave in 2008.) One of the leprechauns told Rose McGowen’s character Paige that “You can make your own luck.” I realized that I had done NOTHING to make my own luck in that area.

I have not created any publication to show off my work. I have not visited any stores to have my work seen. I have pretty much sat on my butt and expected the stores to “find” me and offer me a contract. Being realistic I know…..THAT AIN”T GONNA HAPPEN.

So here are the things I need to do to make that goal a reality.

I need to create a wholesale price list and brochure.

I need to find a couple of stores that sell handmade arts and visit them to see if my work would fit.

I need to get over the fear and just do it.

We can’t be seen, if we do not bother to get out of the house! To make my own luck I need to create opportunities for luck to find me!