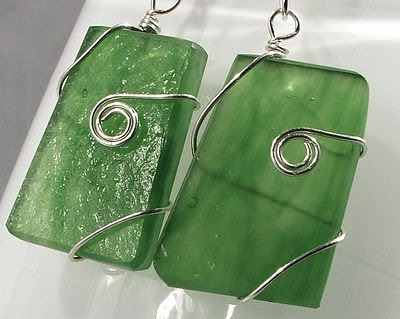
They appeared dark and a bit blurry. Plus, I had noticed that the color looked a little off. So, I began learning about photography techniques and tools. By no means am I a professional photographer or an expert. However, I have picked up a few tips on photographing small objects like jewelry. I thought I might share a couple of them with you.
As far as cameras go, mine is by no means a top of the line. I am currently using a 4 mega-pixels camera that I bought over 3 years ago. I have no image stabilization, or face recognition with my camera. However, one thing I did insist on when I bought my camera was the ability to upgrade via lenses. So, I ended up buying what is referred to as a "High End Consumer" camera. This is a high-end point-and-shoot camera that has some features like a DSLR (Digital Single Lens Reflex Camera). It also has an adapter to add lenses to the camera. I cannot, however, remove or replace the main lens.
Since I insisted on the ability to upgrade lenses, I figure I should try to use that feature. So I ended up buying a macro lens. This lens magnifies your image by acting like a pair of glasses. It literally goes on top of my current lens. While it is a great tool, it does have some limitations. Once of which is that an adapter must be used which decreases the amount of available light picked up by the camera creating darker photos.
A great way to create better lighting is to use a light box or light tent. Etsy has a DIY listed on the Storque Blog, however I have found a better tutorial for an at home light box. Digital Photography School.com has a great tutorial for a light box. This is similar in style to the table-top studio light box I am currently using.

You need a light box that has a translucent top for my next couple of tips.
To reduce shadows, try lighting the box from the top. However do not have the light pointed straight down. A better solution is to use two lights from the top. Have the light on the right pointed down towards the left wall, and the light on the left pointed down at the right wall. You want the diagonal light paths to cross above you item in the light box. See the photo below for a picture of what I am talking about.
Even using a great light box and great lights (my light box come with professional lights, but I did switch the bulbs to true color bulbs), I have not had the amount of light I felt I needed.
A few weeks ago I found my answer. I was reading the January 2010 edition of The Crafts Repot, when I spotted an article by Steve Meltzer. The article titled “Getting Close: Photographing the World of Small Crafts”, looked at lenses and lighting when dealing with Macro photography. Steve mentioned creating a “post office box” studio. The light box was not what caught my interest, so much, as what he used to line the light box.
Aluminum Foil!
It was a eureka moment. I went and immediately lined the sides of my light box with foil. The results were amazing! The foil bounces the light back and increases the light in the box. My camera now had more light to draw on when photographing my work.
Here are the before and after.


Such a small investment yielded great results.
Want to purchase the items seen in today's blog? You can find them here, along with other great jewelry that I have made.
WOW!~ Eluna thank you so much for taking the time to write it all down, post it and explain it! SUCH a treasure of help! Thank you ♥
ReplyDeleteThank you! This is so informative! I have experimented with a light box before with good results, but FOIL!? I'm so excited to try this!
ReplyDeleteWow, I think I'm going to make one. Thanks so much for today's post. Your work is beautiful too by the way.
ReplyDeleteWonderful idea with the aluminum foil!
ReplyDeleteMy lightbox is sitting high on a shelf :-) Most of my items are too big for it. I bought more materials to make a larger one. Maybe I will finish it this year. :-)
http://christiecottage.blogspot.com
Wow, that's quite a setup you have! The photos look excellent, very bright and clear.
ReplyDeleteyour new pictures look great. :)
ReplyDeletei practically LIVE behind my DSLR... nothing beats a good camera... love your home made studio lightbox! saves a fortune doing it that way :)
ReplyDeleteThanks so much for the tips! Love the foil idea. I'll have to give it a try!
ReplyDeleteI am so glad you guys can use this information. When I first read about using foil, I did not realize how awesome the photos would turn out. I am glad to share this information with you!
ReplyDeleteThe foil makes sense since my husband's professional lights have a type of foil in them.
ReplyDelete