Tip 1: Using a color balance card
I don’t know about you, but I have a devil of a time getting my photos to echo the colors I see with my eyes. Even when I change the light balance, I still have red or blue overtones on my pictures. So I have found this quick little tip allows me to fix that problem.

When I take a photo now I place a tiny card on the edge of the photo display; I keep it barely visible in my viewfinder. This is my own version of a color balance card. It contains one stripe of black and one stripe of white. I also continue to set the white balance based on the lighting that I am using (I do have a light tent with professional grade high intensity daylight bulbs.)
Once I take the photo, I can use the card to set the true colors when I edit it later.
Tip 2: Using the levels tool.
This is one of my favorite tools to using in Photoshop. Once I import the photo into Photoshop, the first thing I do is hit the ctrl – L (cmd-L in Macs). This will bring up your levels tool. This tool allows you to specify what color is black, mid-point gray, and what color is white. Your tools should look something like this when you pull it up.
 The areas I have circled in red are the samplers I use to adjust my photo colors. This is where the color balance card from tip one comes into play. I simply use the white dropper on the white stripe, and the black dropper on the black stripe. This tells Photoshop to use those colors as the set points, ie this is what white looks like and this is what black looks like.
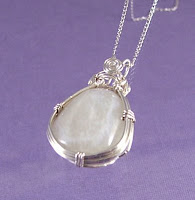
Look at these before and after to see the difference. 

When I am done adjusting my color balance, I then proceed to zoom in a little more with my
 photo. How do I zoom in you might ask. Well I simply crop the photo. Yes this does actually make the photo smaller, but it discards all the unwanted parts of the photo, so you can center on the work in question. You will find your crop tool on the left hand palette. It looks something like this:
Again here is a photo after cropping.
 Tip 4: Healing Brush Tool
If you have read my blog in the past, you will know that I recently rediscovered this wonderful
 tool. You use it in much the same manner as you would use the clone stamp tool. Unlike the clone stamp tool, the Healing Brush tool merges the textures, colors, and luminosity of both your sampled area and your working area. You can find your Healing Brush tool just below your crop icon. It looks like a Band-Aid.
You can remove scratches and blemishes with ease using this tool. Just be careful to choose a sample area nearby your working area. This will help to prevent noticeable smudges in the picture.
Here are a couple of photos before and after I repaired using the Healing Brush tool.

I hope you have found some interesting ideas in this blog post. Have a great day!
That's really cool! Thanks so much for the tips. I think jewelry must be one of the hardest items to photograph.
ReplyDeleteVery helpful, thanks so much!
ReplyDeleteAwesome! Thanks for posting, I have just discovered photoshop and it has changed my life:)
ReplyDeleteThis is very helpful, I am going to try on my next photo.
ReplyDeleteThis was a great post...I love the tips and will be using them the next time I upload photos to Etsy...thank you!
ReplyDeleteSome very helpful tips. The levels tool definitely helps!
ReplyDeletewww.akanedesigns.blogspot.com